![]()
Ver 1.0 Date 9/9/2014
How to Take Virtual Machine Inventory
Overview
SapphireIMS allows you to discover and monitor virtual machines in the same manner that you would discover and monitor other network devices. The discovery is performed by using the VM data collection credentials that is specified in the profile manager module. The discovered virtual machine server and the virtual machines partitioned on it can be viewed under the “Inventory” menu - > “Virtual Machine” tab.
Currently SapphireIMS provides support for VMWare, Hyper V, Xen OS and VMWare cluster inventory data collection - VMWare vCenter server formerly known as VirtualCenter virtual machine servers
Step 1: Create Credential Profile
For taking VM Inventory for VMware
Go to Settings Tab-> Asset and Inventory Management-> Profile Manager. Click on “Add”
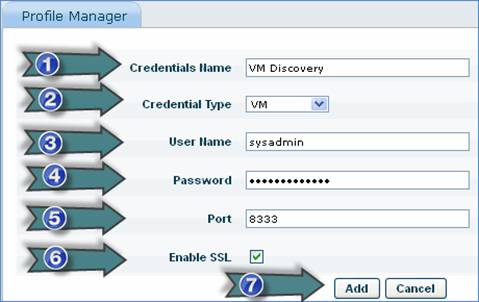
1. Type the Credential Profile Name
2. Select Credential Type as “VM”
3. Type the ESXi Server Login Name
4. Type the ESXi Server Login Password
5. Type the VMWare Port Number
6. Check to enable SSL
7. Click “Add”
Note: To find the Port and SSL related settings, open a Web Browser in SapphireIMS server. Type the VMWare URL (i.e. http or https://<ESXi Server IP Address>:Port) in the browser and press Enter.
The URL should be accessible. From the URL, find the Port Number and whether SSL is needed or not.
Follow the instructions given in the above screenshot to add the Credential Profile. Once a profile is created it will be listed in the “Profile Manager” page
1. Click here to edit the Credential Profile settings
To delete a Credential Profile, select a profile and click on “DELETE”. To edit the settings of a Credential Profile click on the profile name
For taking VM Inventory for HyperV
Go to Settings Tab-> Asset and Inventory Management-> Profile Manager. Click on “Add”
1. Type the Credential Profile Name
2. Select Credential Type as “WMI”
3. Type the Windows User Login Name
4. Type the Windows User Login Password
5. Select User, Type (Domain or Local) For Domain User, select the Domain Name. If the Domain Name is not listed, then click “Add New Domain” to add a new domain
6. Click “Add”
Follow the instructions given in the above screenshot to add the Credential Profile. Once a profile is created it will be listed in the “Profile Manager” page
1. Click here to edit the Credential Profile settings
To delete a Credential Profile, select a profile and click on “DELETE”. To edit the settings of a Credential Profile click on the profile name
Step 2: Create Discovery Profile
Go to Settings Tab-> Asset and Inventory Management-> Discovery Profiles and Wizard. Click “Add”
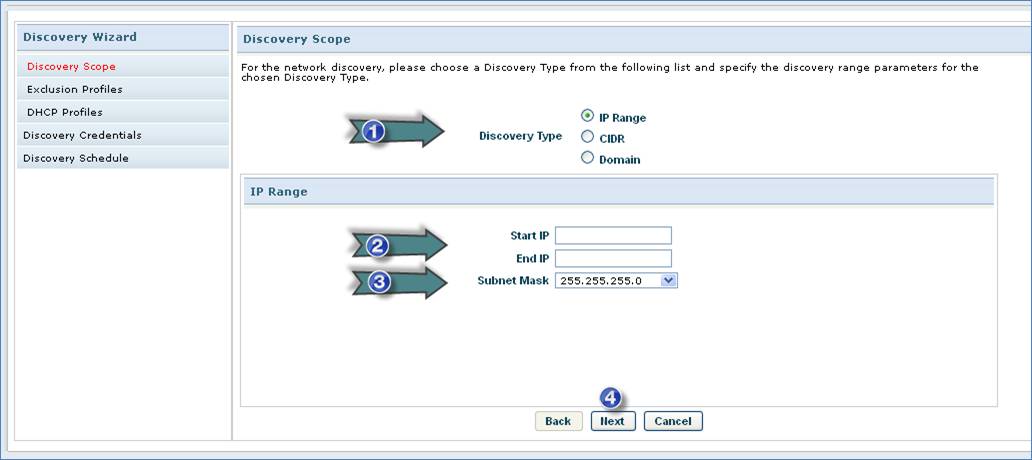
1. Select Discovery Profile as “IP Range”
2. Type the ESXi Server/Cluster or HyperV Server IP Address in “Start IP” and “End IP”
3. Select a Subnet Mask
4. Click “Add”
Follow the instructions given in the above screenshot. Click “Next” 3 times in Step 4. This will take you to the “Credential Profile Selection” page
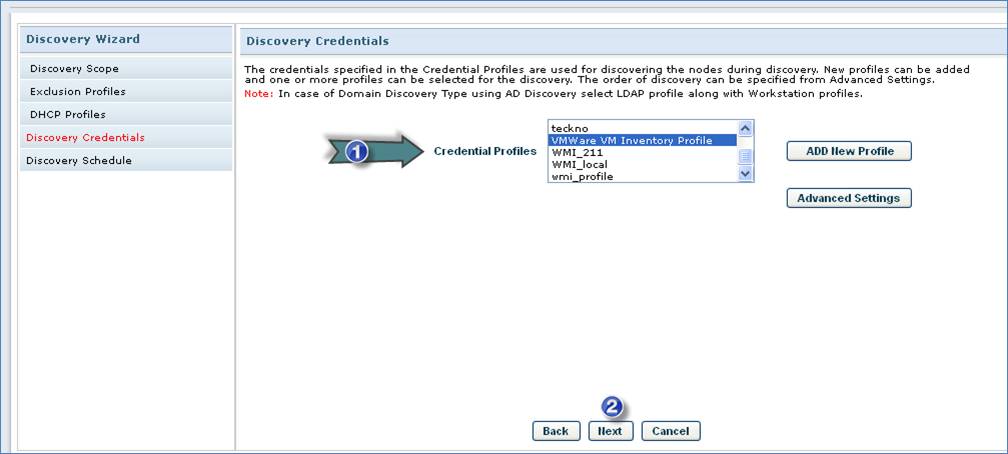
1. Select a VM Credential Profile
2. Click “Next”
Follow the instructions given in the above screenshot. Click “Next” in Step 2. This will take you to the “Discovery Rule Scheduler” page
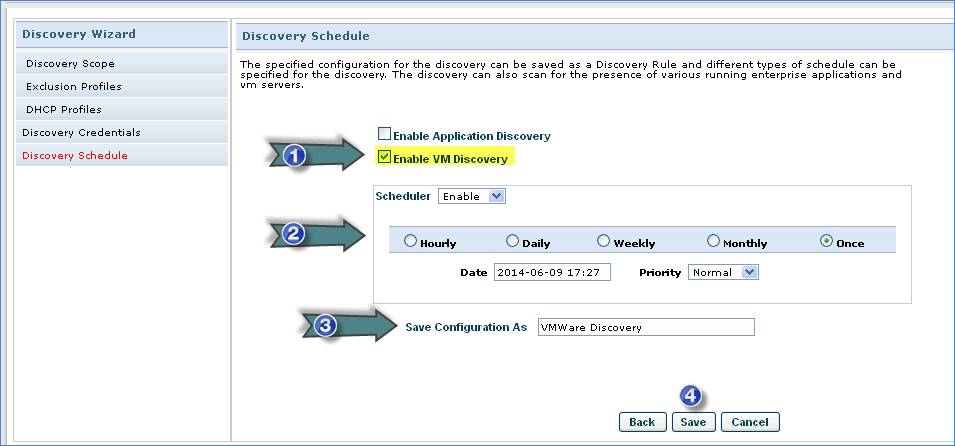
1. Check “Enable VM Discovery”
2. Select the schedule to run the Discovery Rule
3. Type the Discovery Rule Name
4. Click “Save”
Follow the instructions given in the above screenshot to add the Discovery Profile. Once a profile is created it will be listed in the “Discovery Profiles and Wizard” page

1. Select a Discover Rule and click here to run it immediately
2. Click here to edit the Discovery Profile settings
3. Click here to edit the Discovery Profile Scheduler settings
4. Click here to view the Status of the Discovery Processes
To delete a Discovery Profile, select a profile and click on “DELETE”. To edit the settings of a Discovery Profile click on the profile name
Step 3: Run Discovery Rule
Go to Settings Tab-> Asset and Inventory Management-> Discovery Profiles and Wizard
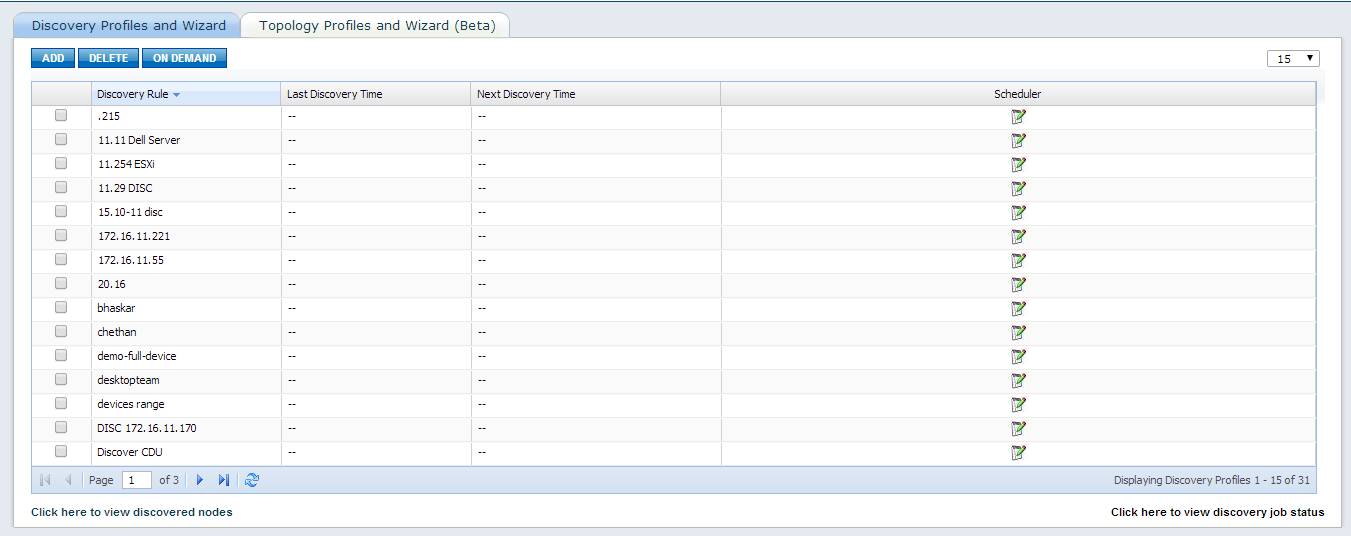
Select a Discovery Rule and click on “On Demand”. This will start a Discovery Process immediately
To change the schedule of a Discovery
Rule click on the ![]() button
in the “Scheduler” column for a Discovery Rule
button
in the “Scheduler” column for a Discovery Rule
To check the Discovery Progress Status go to Inventory Tab-> Discovery-> Discovery Status tab
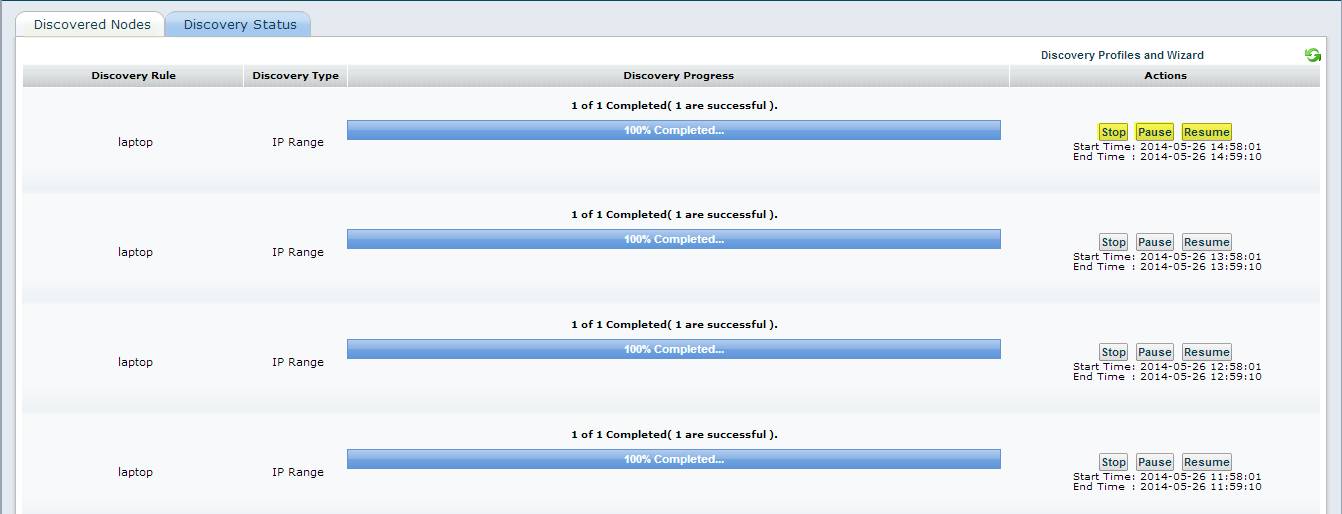
You can Stop, Pause or Resume a Discovery Rule using the buttons in the “Actions” column
Step 4: View Virtual Machine Inventory
Go to Inventory Tab-> Virtual Machine. This will list all the ESXi and HyperV Servers and/or VMware Clusters
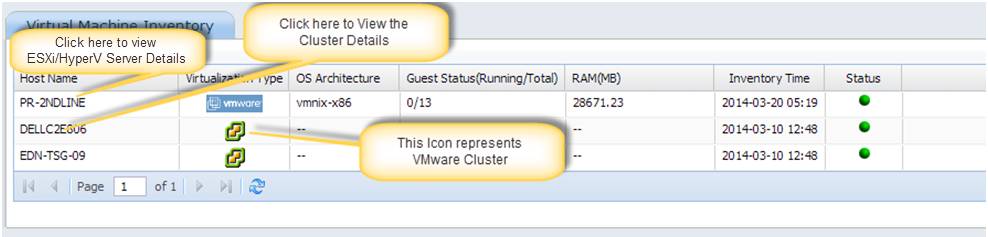
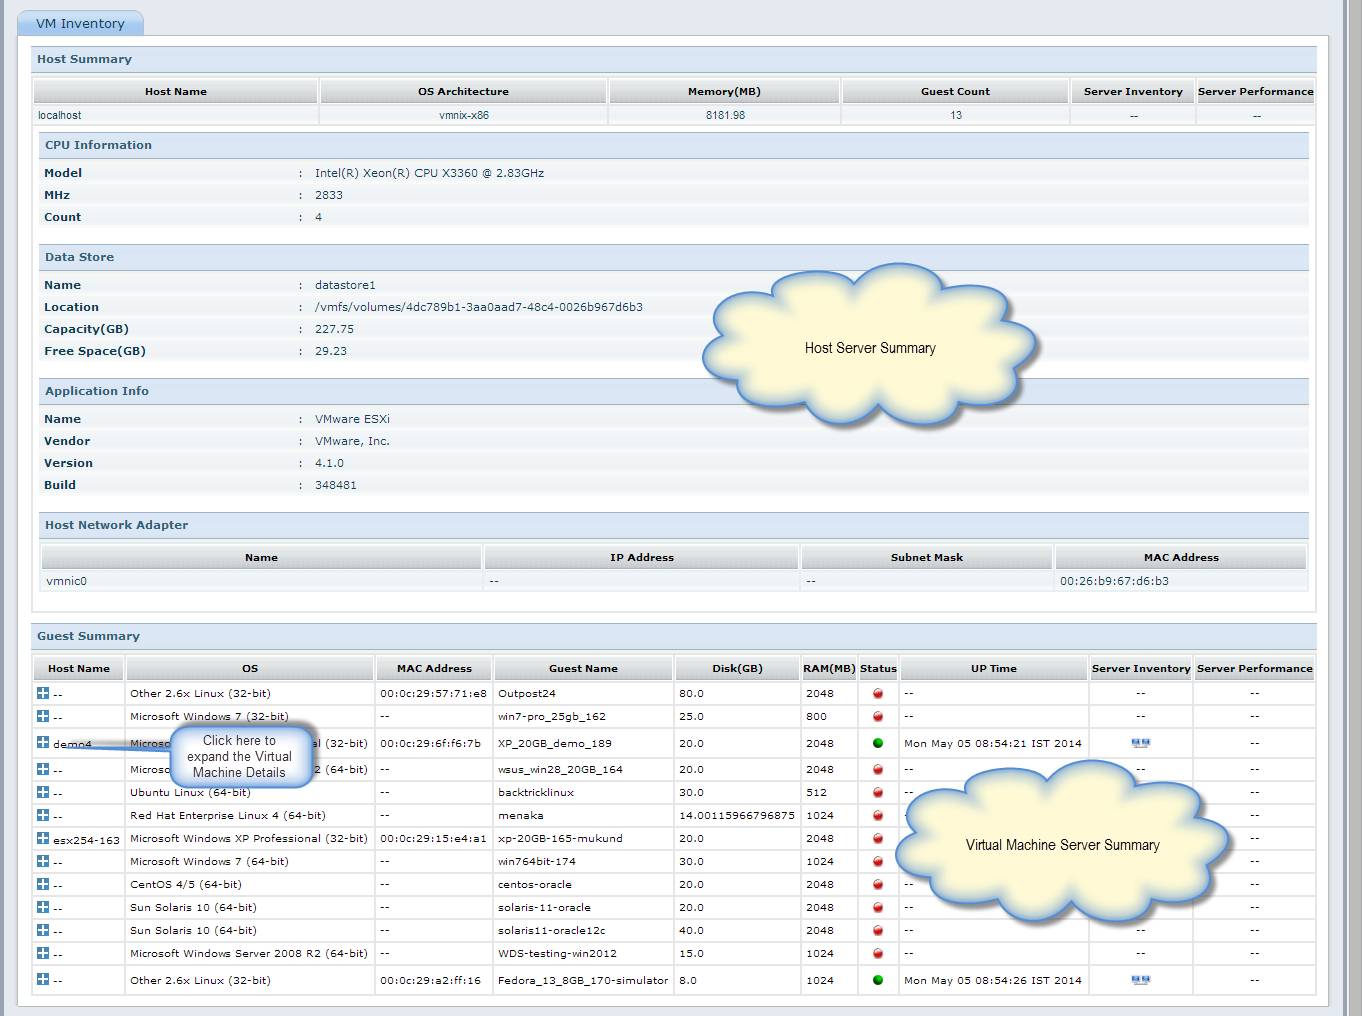
Click on a Host Name of the VMware or HyperV Server to view the detailed Virtual Machine Inventory
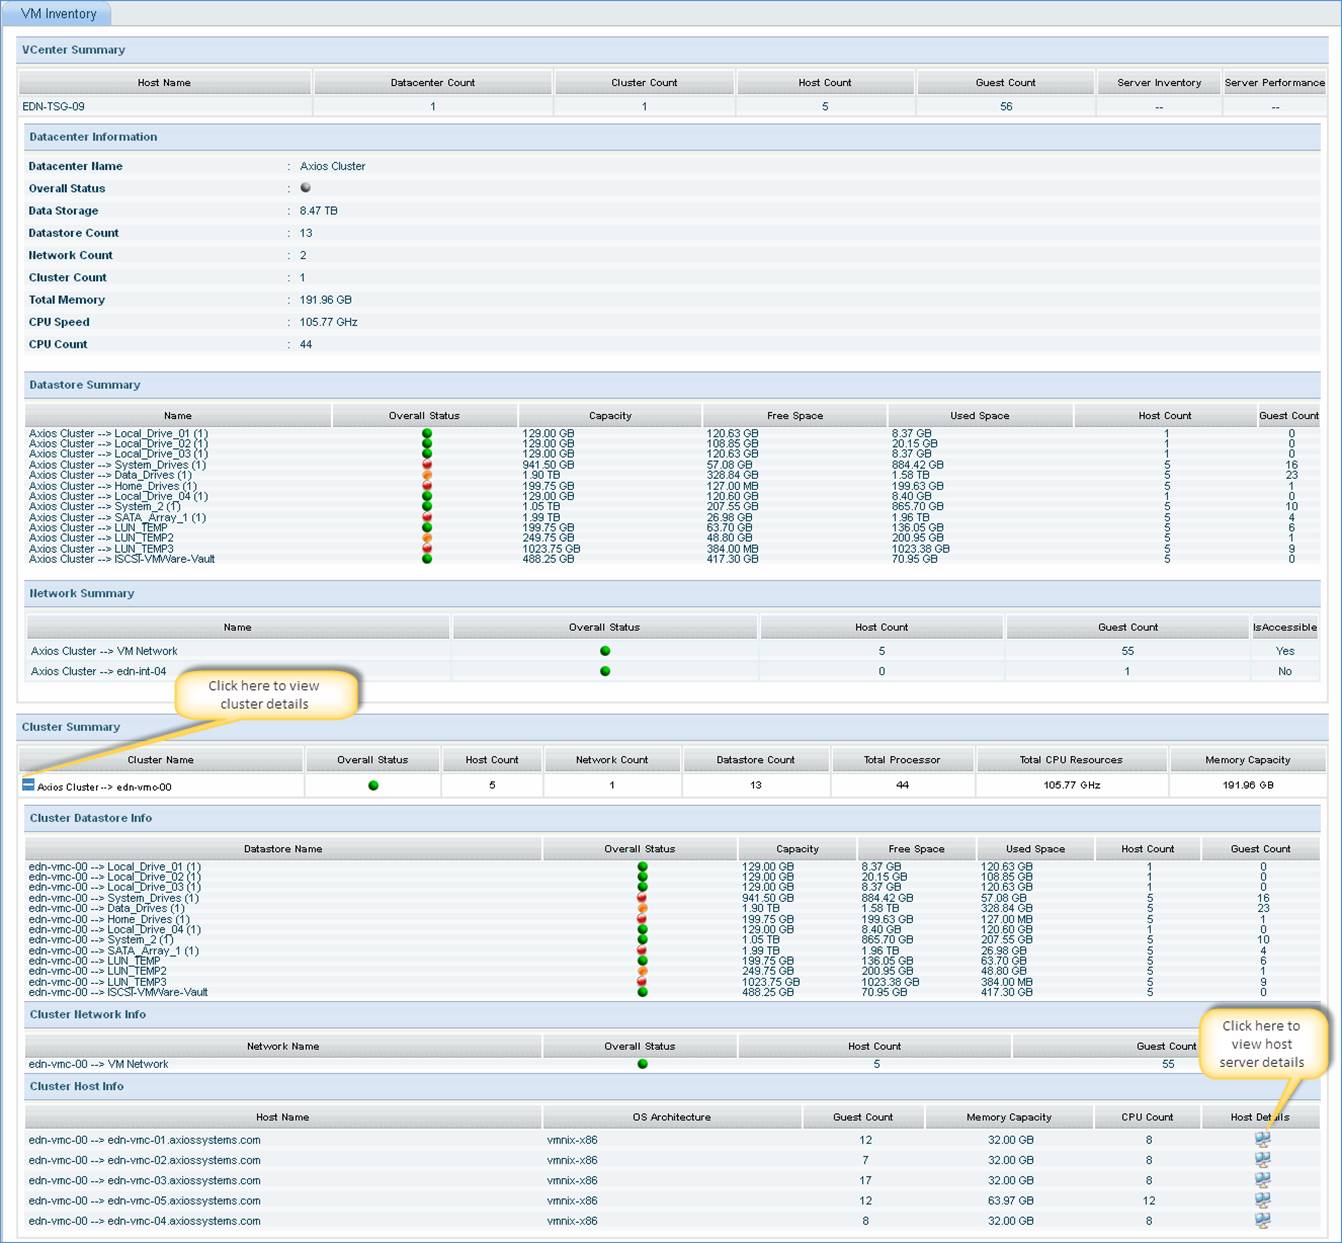
Click on a Host Name of the VMware Server Cluster to view the detailed Cluster and Virtual Machine Inventory
Troubleshooting Guidelines for VMWare and Hyper V discovery & data collection
System Errors
Error Code |
Recommendation |
Unable to authenticate.
|
Provided credentials are improper with respective profile rules mapped. |
| Network error: Connection timed out. | Windows Firewall is blocking (need to disable or need to add port exception) or Vim service is not running. |
COM access denied error
|
Provided credentials are improper with respective profile rules mapped. |
RPC server is unavailable
|
Windows Firewall is blocking (need to disable or need to add port exception) or RPC Service is not running. |
| Feature or operation is not supported(On partial data collection) | If WMI class not found in the WMI Repository
|
Case1: Data collection failure due to vim service not enabled in VMWare server or RPC server unavailable in HyperV server.
Vim Service availability can be concluded in VMWare by access URL from browser.
<schema>://IP:Port//sdk/vimService.wsdl Eg:- http://172.16.11.4:443/sdk/vimService.wsdl
This will provide one WSDL data.
In case of Hyper-v (WMI), connect the target machine using 'Wbemtest' with provided credential.
Case2: Data collection failure due to wrong username or invalid password.
Log File Analysis
The following are the log files that are related to this module
File Name |
Purpose |
SIMS_Nodescanner.log |
Any error with respect to discovering the node can be traced from this log file. |
SIMS_WMICollect.log |
In case of Hyper-v server inventory. Any errors with respect to Hyper-v server data collection can be traced here. |
SIMS_VMachineMon.log |
In case of VMWare server inventory. Any errors with respect to VMWare data collection can be traced here. |
Note: The log files are available in <Installed-Path>\ConsoleManagement\log. You can also locate a file with the .bak extension.
Environment Specific Debugging
1) Ensure that the SIMS_Nodescanner.exe is running. To verify this ‘Go to Windows Task Manager and check whether the SIMS_ Nodescanner.exe is running’.
2) 8333 (TCP) [Used by vim Service] is open and 135 (TCP) [Used by DCOM for Microsoft RPC] is open.
3) In case of Hyper-v discovery, Authenticate the target machine using provided credential through wbemtest client.
4) In case of VMWare discovery, check whether vim Service is enabled and can be accessed through the browser.