![]()
Ver 1.0 Date 9/9/2014
How to create a Software Deployment Package and execute it on a Device
Overview
As part of the system management activities, SapphireIMS provides an ability to distribute and remotely install MSI packages as well as non MSI software packages. Any package that needs to be distributed to the client system needs to be first defined in the system. To get the package into IMS repository, perform the following
Step 1: Create Software Package configuration
Go to Settings Tab-> Software Management-> Package and Policy Management. This will list the current packages that are configured in the system.
To create a new package, click ‘CREATE PACKAGE’
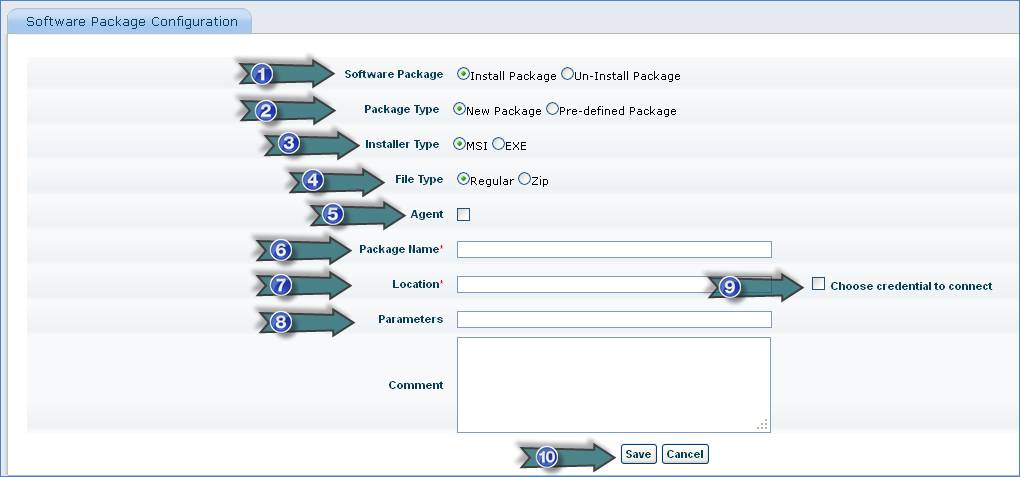
1. Select “Install” or “Un-install” option
2. Select the type of package. If package type is pre-defined, select the pre-defined package from the drop down
3. Select Installer Type
4. Select ‘Regular’ or ‘Zip’ depending on the file/folder you want to install. You can use a compression utility like WinZip/WinRAR/7Zip to create file type ‘Zip’
5. Select this checkbox if you are creating a package for Agent. The ‘File’ text box will be visible. Click ‘Upload’ to display ‘Agent File Upload’ window. Click ‘Browse’ and locate the file to be uploaded. Click ‘Upload’
6. Enter name of the package
7. Enter location of the package
8. Select this box to specify a credential profile
9. Contact the software vendors for the various switches that can be used with the MSI package
10. Click to save
Note: MSI packages support different switches (parameters) that can be passed as part of the installation. For instance for Microsoft Office installations the serial number of the software can be passed as part of the MSI package. The parameter to be used
Is PID=xxx-xxx-xxx-xxx
Contact the software vendors for the various switches that can be used with the MSI package
If more than one parameter needs to be specified, then separate it with a single space
Run - This option will be available only when the selected file type is zip
For e.g. to install a particular product along with the MSI file there could be supporting files and directories. In such scenarios all these files (including the MSI files) can be zipped into a single file.
In the run option you need to select the file which needs to be run after it is copied into the target system (this will typically be an MSI file that you click for regular installations)
Uninstall Package option
Application Name - Name of the application to be uninstalled
Application Version - Version of the application to be uninstalled
Uninstall parameters - Application specific parameters needed for un-installation
Comment - User comments for the package that is created
Note: SapphireIMS provides uninstall parameters for 15 commonly used pre-defined non-MSI packages.
Step 2: Software Package Installation
SapphireIMS allows you to install pre-defined packages i.e. packages created under ‘Package and Policy Management’.
Go to Settings Tab-> Software Management-> Software Install
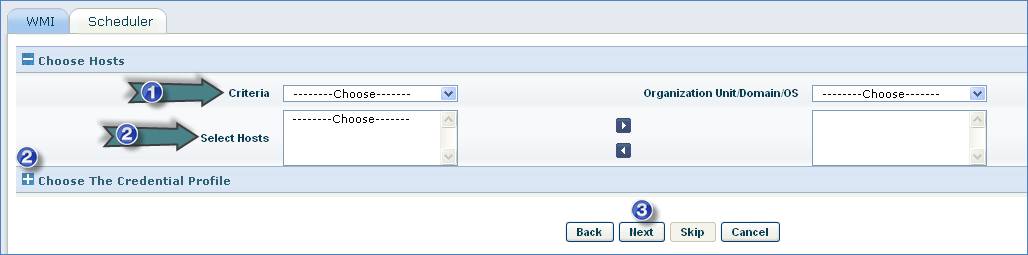
1. Select the criteria for selecting hosts
2. Select the hosts where the software package has to be installed or select the discovery credential profile if the hosts are to be discovered
3. Click “Next”
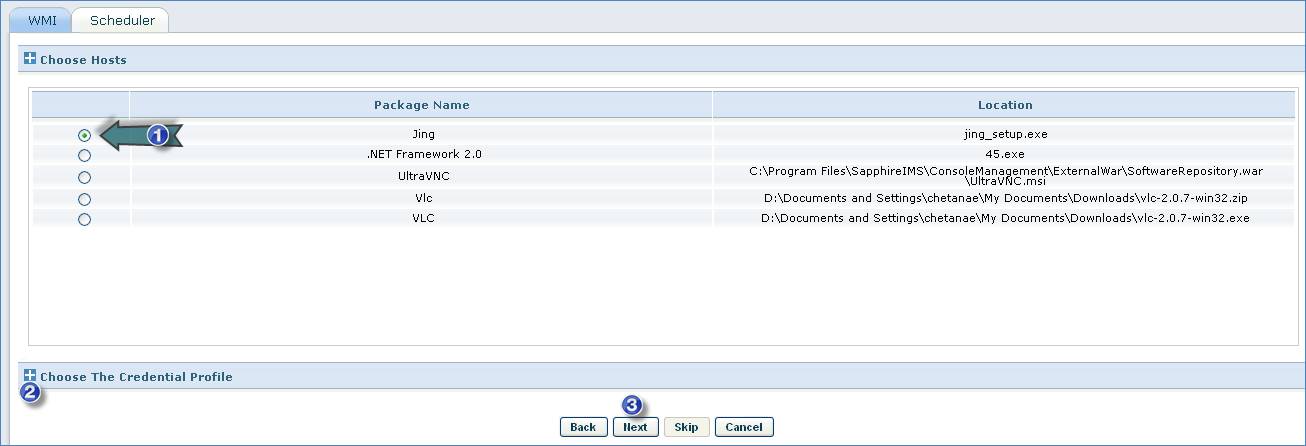
1. Select the package to be installed
2. Select the discovery credential profile if the hosts are to be discovered
3. Click “Next”

1. Select the schedule for the package installation
2. Enter the number of times the software installation job has to be retried
3. Enter the Retry Interval
4. Select notification rule if required to send notification to specified users and roles
5. Click “Save”
Note: Click ‘IT Automation’ menu-> Automation Tasks-> Automation Task Status to view the status of the software package installation
Troubleshooting Guidelines for Software Deployment
System Errors
Ref: http://msdn.microsoft.com/en-us/library/aa390890%28v=vs.85%29.aspx
Log File Analysis
Following set of log files are related to the automation tasks module.
File Name |
Purpose |
SIMS_JobHandler.log5 |
Any debug information regarding job processing post the schedule can be traced with this log file |
SIMS_ProbeScheduler.log6 |
Any debug information related to scheduling can be traced with this log file |
server.log7 |
UI related errors can be traced with this log file |
SapphireIMSAgent8 |
Applicable only for the agent architecture. This gives the complete error codes recorded with the agent operations and communications |
Note5: The log files are available in <Installed-Path>\ ConsoleManagement\log. You can also locate a file with the .bak extension.
Note 6: The log files are available in <Installed-Path>\ ConsoleManagement\log. You can also locate a file with the .bak extension.
Note 7: The log files are available in <Installed-Path>\ WebManagement\standalone\log. You can also locate a file with the .1 extension.
Note 8: The log files are available in <Installed-Path>\logs. You can also locate a file with the .bak extension. Note that this is stored in the system where the agent is installed
Environment Specific Debugging
§ Ensure that the Master agents are up and running
§ Ensure that sufficient disk space is available on Sapphire server and all Master agents
§ Check for connectivity between agents and SapphireIMS server
§ If proxy is configured, make sure proxy settings are properly defined